Ray diagram: convex lens (object beyond 2F)
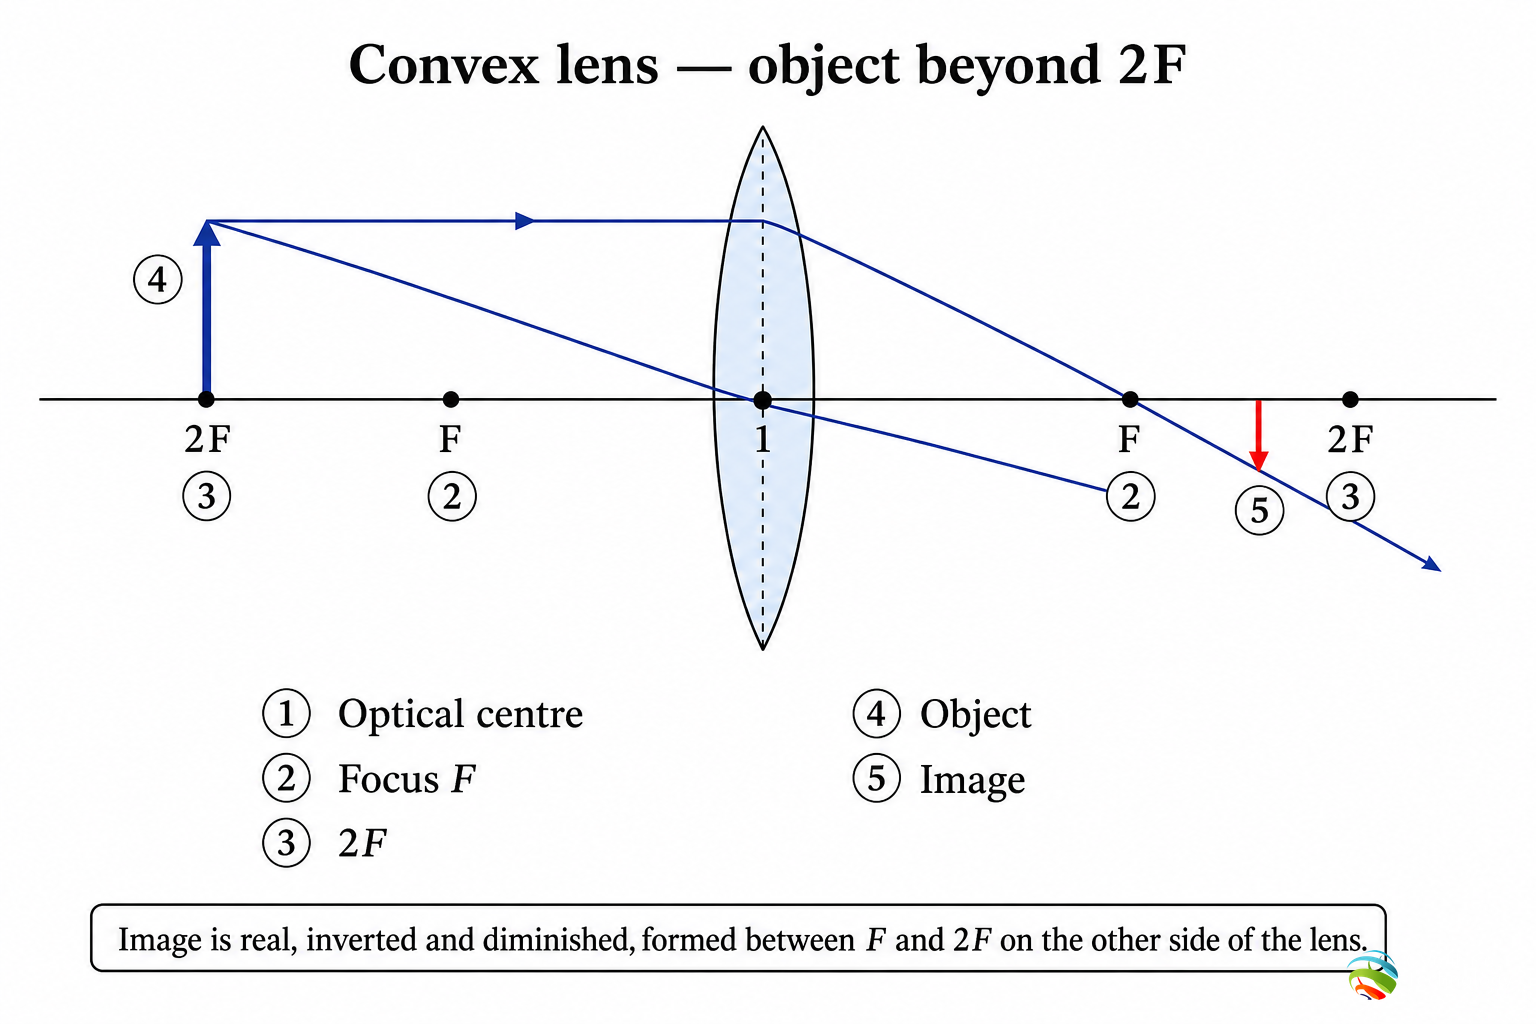
Real, inverted, diminished image between F and 2F on other side.
Step 1 — Study the figure
Cover the label key on the image, name each numbered part, then check the explanations below.

Step 2 — Diagram details for students
What this diagram shows
For a convex lens with object beyond 2F, the image is real, inverted, and diminished between F and 2F on the other side. Lens formula and power definitions are linked to this geometry. Household convex lenses converge light.
Numbered parts — mark & remember
Match each number on the figure with the meaning below. Say the function aloud once.
1 Object beyond 2F
Object is farther than twice the focal length from the optical centre. This gives a diminished real image. Camera-like reduced real images relate to this range.
2 Optical centre / F / 2F
Mark optical centre O and focal points F, 2F on both sides. A ray through O goes straight undeviated. Parallel ray through the lens passes through F on the other side.
3 Image between F and 2F
Image forms on the opposite side between F and 2F. It is real, inverted, and smaller than the object. Screen can catch this image.
4 Two-ray method
Intersection of the undeviated central ray and the parallel-to-F ray locates the image. Draw arrowheads and keep the axis straight. Neatness matters in board ray diagrams.
How to read this figure
- Converging lens + object beyond 2F → real diminished image.
- Use 1/v − 1/u = 1/f with Cartesian signs.
- Power P = 1/f (f in metres), convex positive.
Redraw for board marks
- Draw biconvex lens and axis with F, 2F marks.
- Place object beyond 2F and draw two rays.
- Mark inverted image between F and 2F.
Board answer tip: Complete ray diagram + one line each for nature, position, and size of image.
Exam tips — don’t lose marks
- Lens formula differs in sign pattern from mirror formula — memorise both.
- Convex lens power is positive; concave is negative.
- State nature, position, size every time.